Getting Started
Your first session
in under 10 minutes.
Install the companion on your Mac or Linux machine, a laptop or a headless server, run your AI agent as you normally would, and start watching it from your phone. This guide walks you through every step, no experience with AI agents required to follow along.
How it all works
Your AI agent (Claude Code, Codex, Gemini, Grok, or Cursor) runs in a terminal on your computer, a Mac or a Linux machine, exactly as it always has. Nothing about that changes.
The Agents At Work companion, the macOS app or the aaw service
on Linux, watches that terminal session using tmux, a standard terminal tool that lets
multiple programs observe the same terminal window at once. It
reads the session output, intercepts tool calls before they execute,
and forwards everything to your phone.
The part that runs on your computer is aaw-core, our open-source engine (MIT on GitHub). The Mac app bundles it, and on Linux the installer sets it up from PyPI. It keeps one outbound connection to a relay, a small server that passes events between your computer and your phone and holds them while the phone is asleep. You can use ours or run your own.
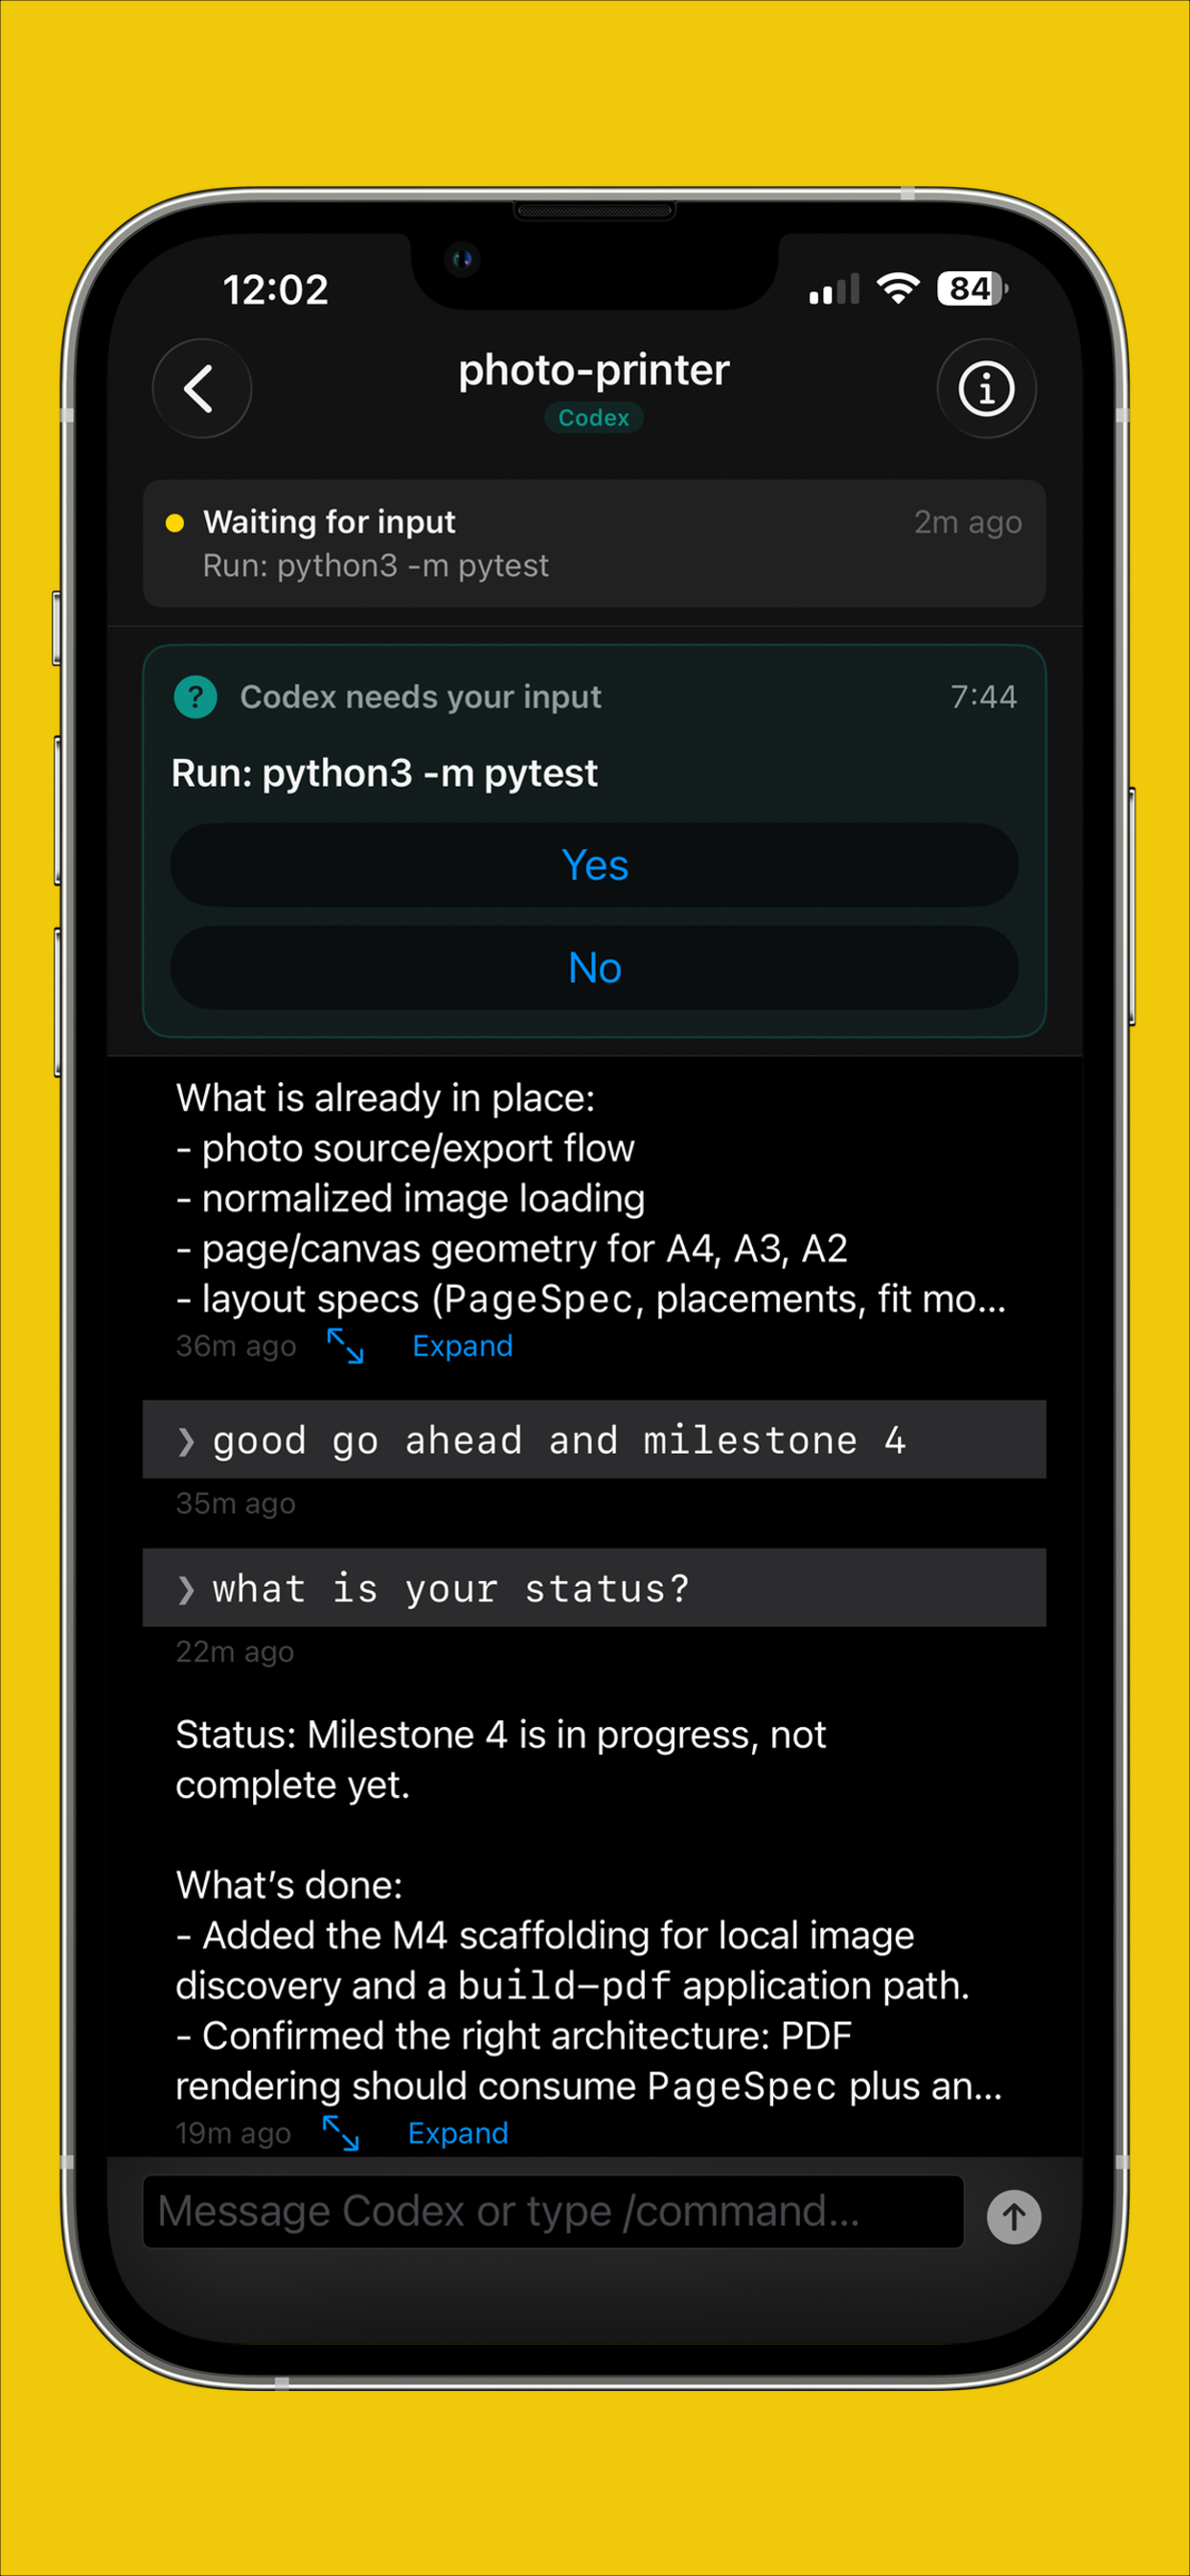
When the agent needs a decision, such as whether to run a command, your phone buzzes. You see exactly what it wants to do, then tap Yes or No. The answer goes back to your computer instantly, and the agent continues.
There are no accounts, on the computer or on the phone. The phone links to a computer by scanning a QR code once. That single scan pairs the two and hands over the key for end-to-end encryption (AES-256-GCM), so conversation content is encrypted before it leaves your computer. The relay only sees ciphertext and the routing details it needs to deliver it, never your prompts or responses in plaintext.
Your tap travels back the same path: phone → relay → aaw-core → typed into the agent's terminal.
-
1
Install the macOS companion app
On Linux? There is no app to download. Steps 1, 2, and 5A are Mac-specific; everything else applies to both. Jump to the Linux section → for the one-line install, the QR pairing, and theaawcommand.A Mac mini, a Mac server, or an older Mac with nobody at the screen? You can skip the app and run the engine headless, the same way Linux does. Headless Mac setup →Download AgentsAtWork.dmg, open it, and drag Agents At Work into your Applications folder.
On first launch macOS may show a Gatekeeper security dialog. Click Open, the app is notarized by Apple and is safe to run.
Download AgentsAtWork.dmg →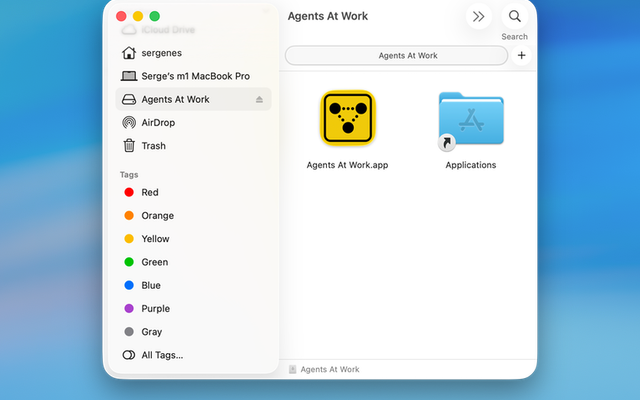
-
2
Open the app on your Mac
Launch Agents At Work. It lives in the menu bar, and there is nothing to sign in to: the app has no accounts, and neither does the phone app. The Mac app is free.
On first launch the app sets up the engine it bundles (aaw-core), the hooks your agents call on every tool use, and the shell integration, so that typing
claude,codex,gemini,grok,cursor-agent, orscootin a project folder starts a bridged session.Pairing happens with a QR code. The menu bar has a Link Mobile item that shows a QR code for your phone to scan (Step 6). That scan is the only thing that connects a phone to this Mac. You do not need to create an account anywhere. -
3
Check that tmux is installed
Agents At Work uses tmux to observe your agent sessions without interrupting them.
Think of tmux as a one-way mirror for terminals. Your agent runs on one side and can't see the mirror. The companion app stands on the other side, reading everything the agent does. Without tmux there's no way to watch a terminal session that someone else owns.
# check if tmux is already installed $ tmux -V tmux 3.4 # 3.2 or newer # if you see "command not found": $ brew install tmux # macOS $ sudo apt install tmux # Ubuntu, Debian, Pop!_OS $ sudo dnf install tmux # Fedora, RHELYou don't need to learn tmux. The companion handles all tmux interactions automatically. You just need it installed, you'll never type a tmux command yourself. One exception: RHEL 10 and its rebuilds ship a broken tmux snapshot, see the Linux section. -
4
Install an AI agent
You need at least one supported agent installed on your computer. You have six options: five cloud-based CLI agents and Scoot, our own CLI that runs free local models with Ollama plus cloud models with your own key. Quick install for each; the
npmandcurlinstallers work the same on Linux, thebrewalternatives are Mac-only:$ npm install -g @anthropic-ai/claude-code# or: brew install --cask claude-code$ claude --versionWorks with a Claude Pro or Max subscription, a direct Anthropic API key, or through AWS Bedrock and Google Vertex AI. Any of these lets you run Claude Code.
$ npm install -g @openai/codex# or: brew install codex$ codex --versionRequires an OpenAI account with API access. Usage is billed per token, no flat subscription required. An existing ChatGPT Plus account does not include API access; you need to add API credits separately.
$ npm install -g @google/gemini-cli# or: brew install gemini-cli$ gemini --versionA Google account is all you need to get started. The free tier includes generous daily limits on Gemini 2.5 Pro. For higher limits or production use, connect a Google AI Studio API key or Google Cloud Vertex AI.
$ curl -fsSL https://x.ai/cli/install.sh | bash$ grok --version# alternative: npm install -g @xai-official/grokRequires an xAI account at x.ai. Usage is billed per token based on the Grok model selected. API credits are managed through the xAI console.
$ curl https://cursor.com/install -fsS | bash$ cursor-agent --versionRequires a Cursor account at cursor.com. A free tier is available.
# install scoot (our own CLI)$ pipx install scootcli# for free local models, install Ollama and pull one$ curl -fsSL https://ollama.com/install.sh | sh$ ollama pull qwen2.5# or larger for better results# ollama pull qwen2.5-coder:14b# optional: add your own key for cloud models# scoot auth (OpenAI, Anthropic, and more)Scoot is our own open-source CLI (MIT on GitHub). It runs in a terminal exactly like the other agents, and it reaches both free local models with Ollama and cloud models like OpenAI and Anthropic when you add your own key. You pick the model as
provider/model. On a Mac you start a Scoot session and choose the model from inside the app. On Linux:aaw start ~/proj --agent scoot --model ollama/qwen2.5:latestfor a local model, or--model openai/gpt-5.3-codexfor a cloud one.Which local model? Scoot works by calling tools, so a local model has to be one that can return tool calls. Use a model from the qwen2.5, qwen2.5-coder, or qwen3 family: these reliably support the tool-calling protocol that lets the agent read files, write code, and run shell commands. Models that can't return tool calls (mistral, llama3.2, etc.) can't act, so Scoot won't run on them.Not a developer? Scoot with a local Ollama model is a good starting point. Local models need no account, no API key, and no per-query charges, and your prompts never leave your computer. If you can install a Mac app, you can run a local AI model.Want cloud models too? Runscoot authto add your own OpenAI or Anthropic key. Scoot also has compaction, sessions, and a router that can send a job to a cheap local model or an expensive cloud one.New to AI agents? Start with Gemini CLI: it has a free tier with no credit card required, just a Google account. Once you're comfortable with the workflow, adding Claude Code, Codex, Grok, or Cursor is straightforward. -
5
Start your first session
There are two equally valid ways to start a session. Pick whichever fits your workflow.
A From the macOS app- Open Agents At Work on your Mac
- Click "Start New Session"
- Choose an agent: Claude, Codex, Gemini, Grok, Cursor, or Scoot
- For Scoot, pick a model (a local
ollama/…model, or a cloud one) - Select your project folder
Every agent, Scoot included, opens a terminal and launches inside tmux automatically. You watch the live feed and answer approvals from the app or your phone.
B From the terminalRun your agent exactly as you normally would, the app detects it automatically.
# go to your project
$ cd ~/projects/my-app

# start any agent, Mac or Linux
$ claude
# or: codex
# or: gemini
# or: grok
# or: cursor-agent
# or: scoot

# Linux only: the explicit form
$ aaw start ~/projects/my-app --agent codex
Agents At Work sees the new tmux session within seconds and starts monitoring it, no extra steps needed. On Linux this is the main way to start sessions, since there is no app.
For developers Method B is the most natural. You don't change anything about how you work: runclaude,codex,gemini,grok,cursor-agent, orscootin your project folder exactly as before, on a Mac or on Linux. The companion hooks into the session silently. -
6
Install the mobile app and link your phone
Download Agents At Work on your phone. You don't need to create an account, your phone links to your computer by scanning a QR code. This one step also sets up end-to-end encryption.
Link your phone (takes about 30 seconds):
- Open the Agents At Work app on your phone and go through the 5 onboarding slides.
- On the last slide ("Almost there"), tap Scan QR Code. Later, you can add more computers from the Computers screen with the QR icon.
- On your Mac, click the Agents At Work menu bar icon and choose
Link Mobile. macOS will ask for your password or Touch ID first,
so a random person at your desk can't generate a pairing code, then a QR code appears.
On Linux, the installer already ran
aaw linkand printed the QR code in the terminal; runaaw linkagain for a fresh one. - Point your phone's camera at the QR code.
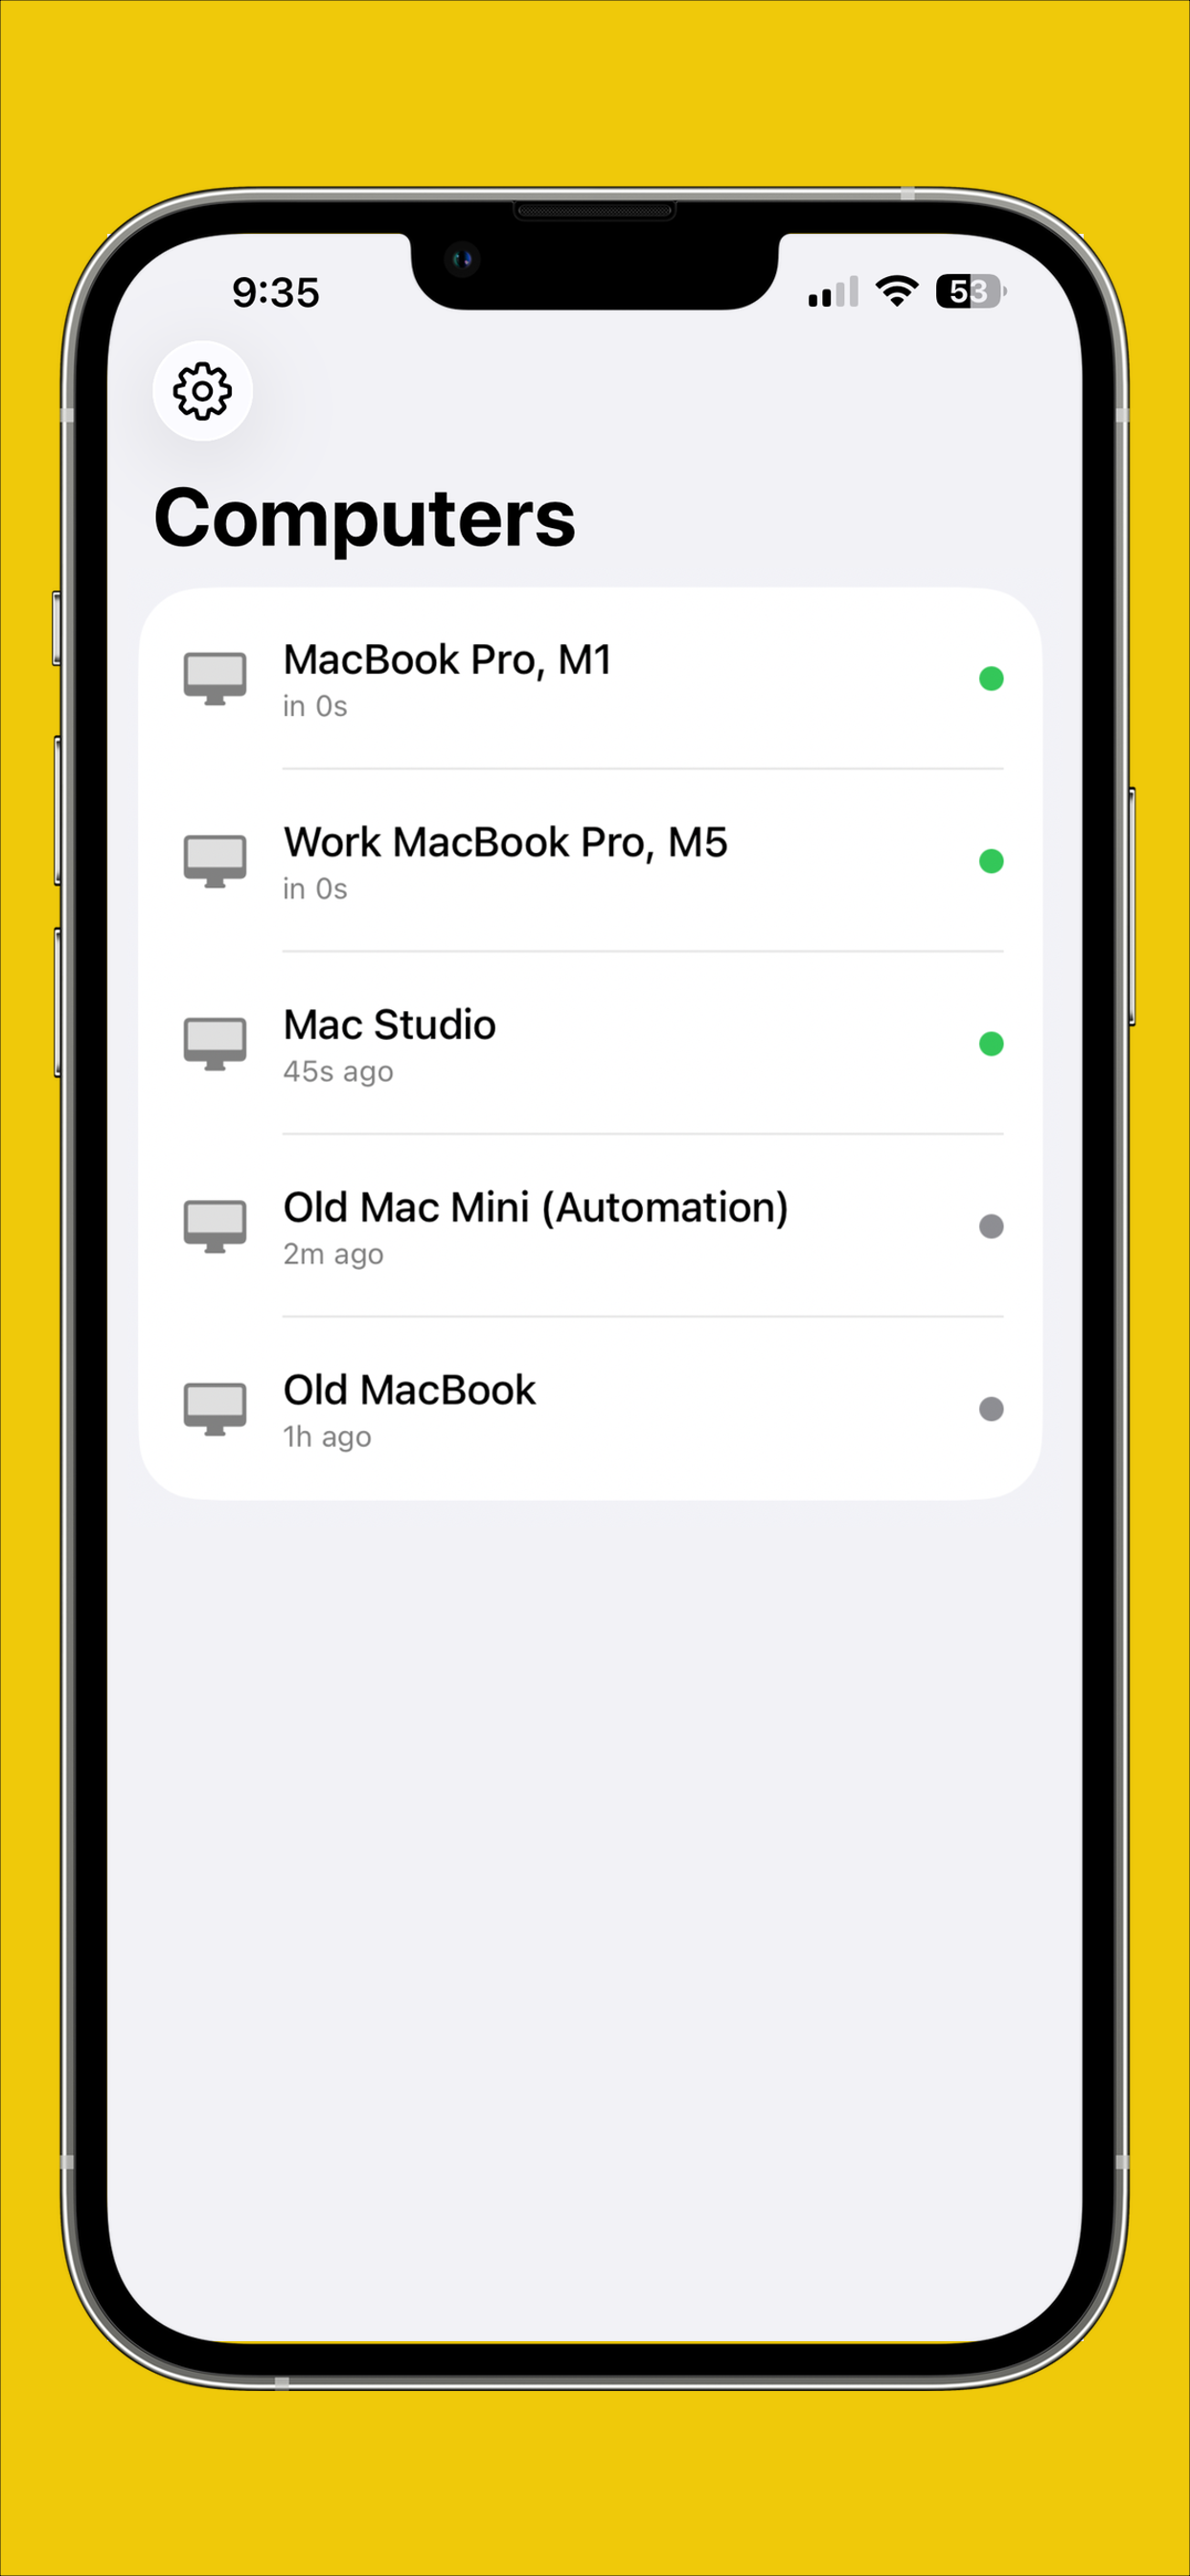
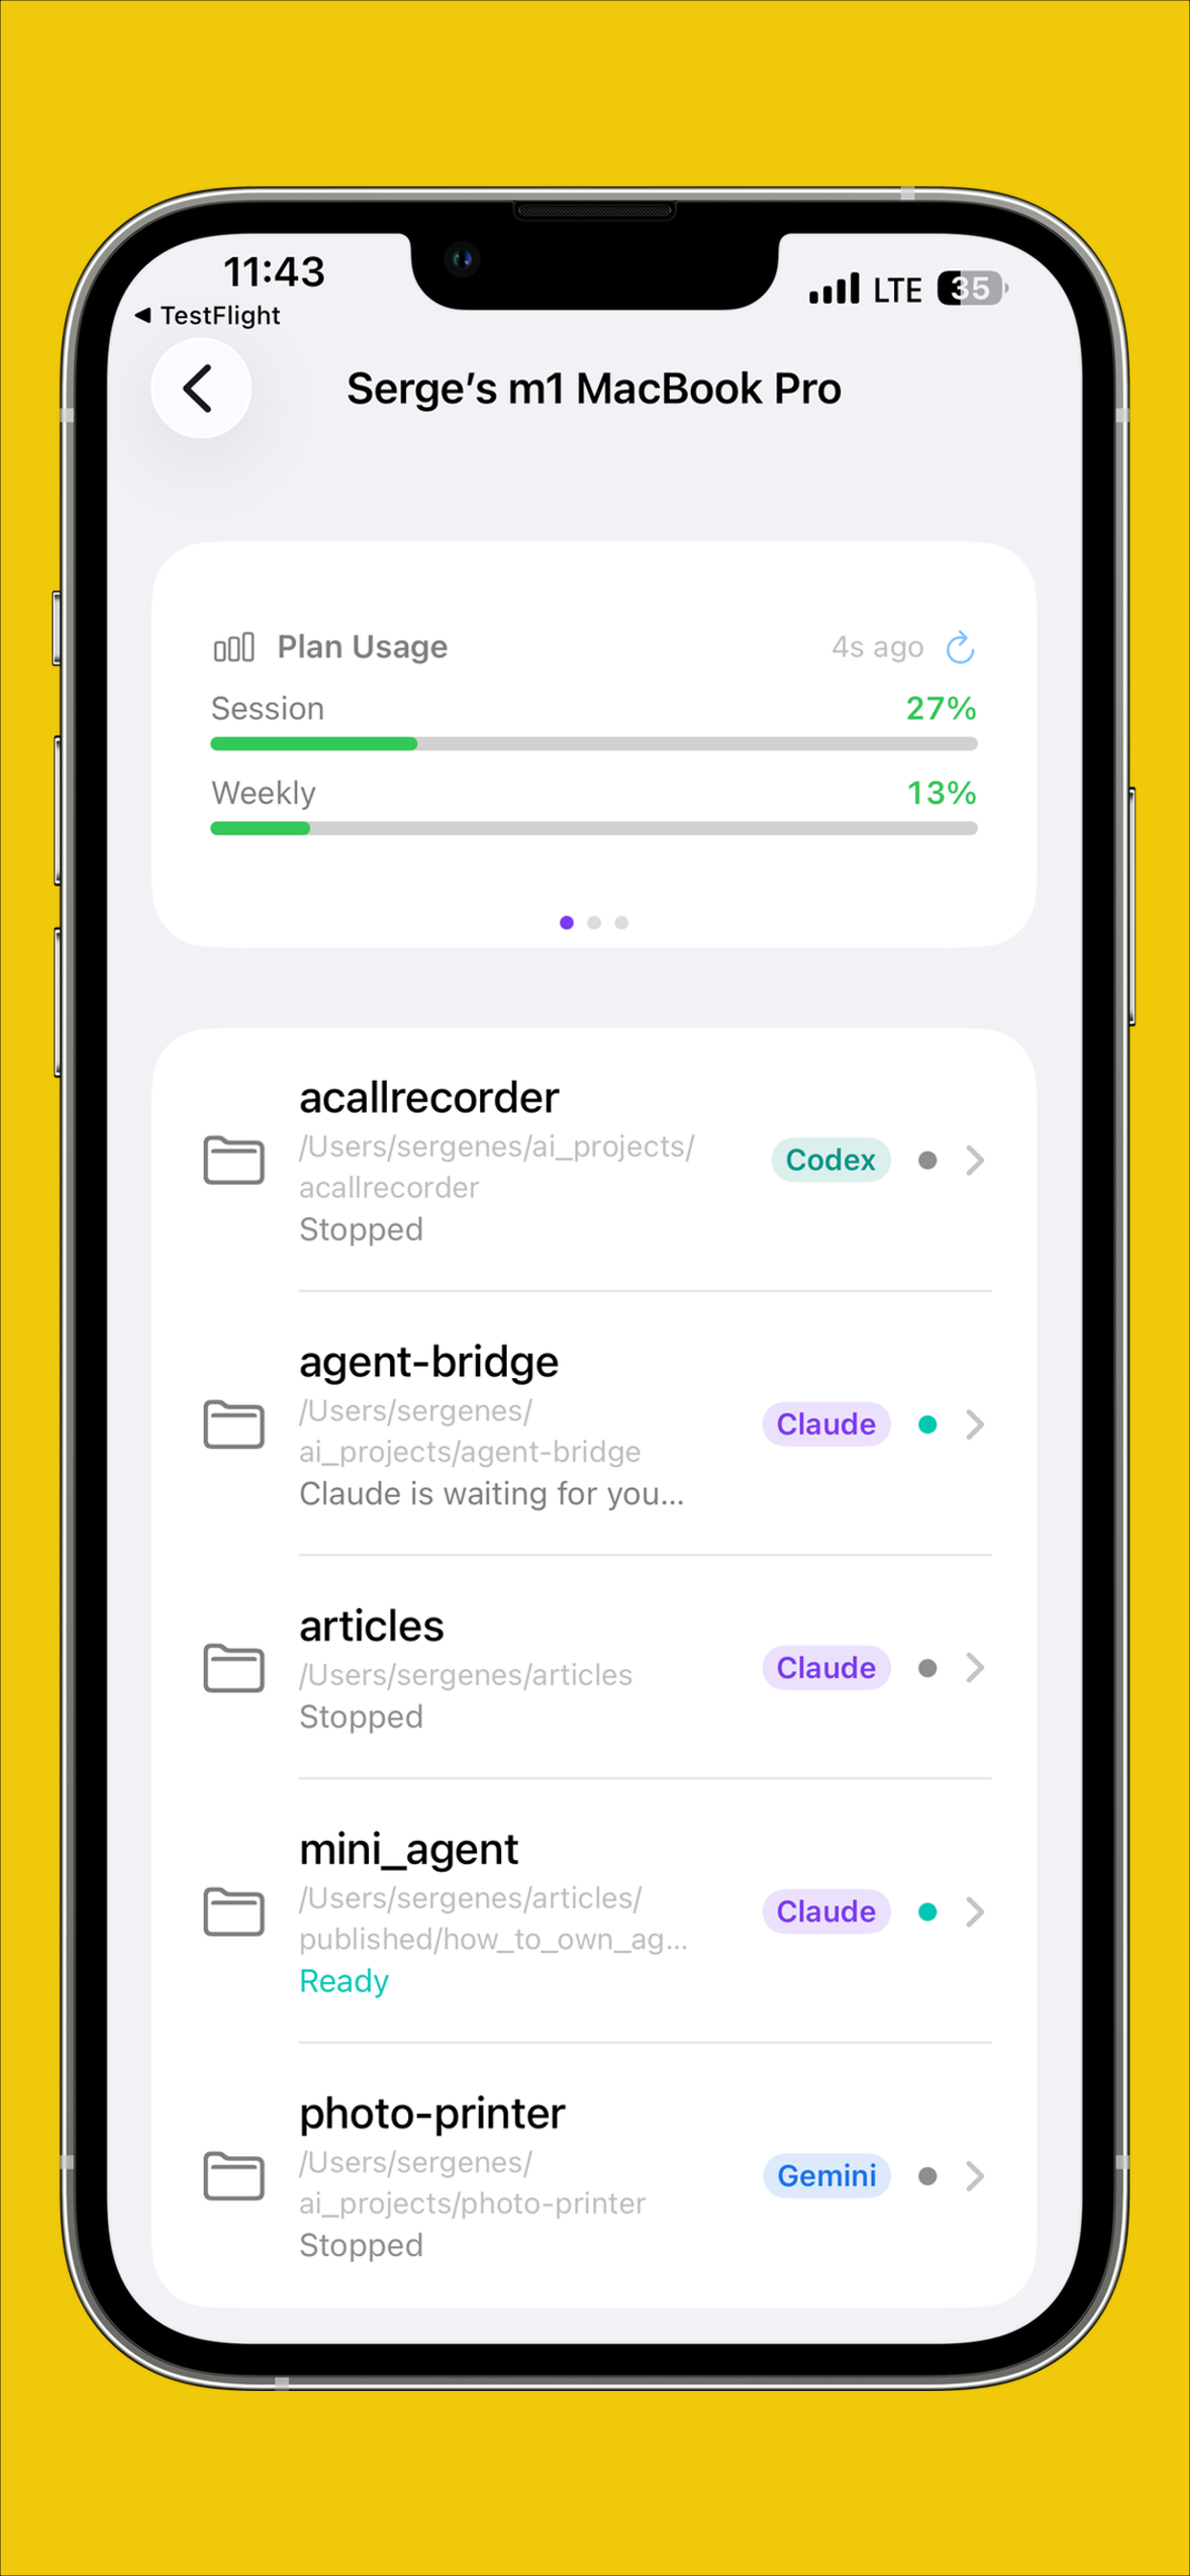
- You'll see "Linked!" once your phone is connected to your computer. The computer's name appears in the app.
Need a new code? If a scan fails or the code has expired, close and reopen Link Mobile from the Mac menu bar, or runaaw linkon Linux, to get a fresh one. Phones you paired earlier keep working when you make a new code.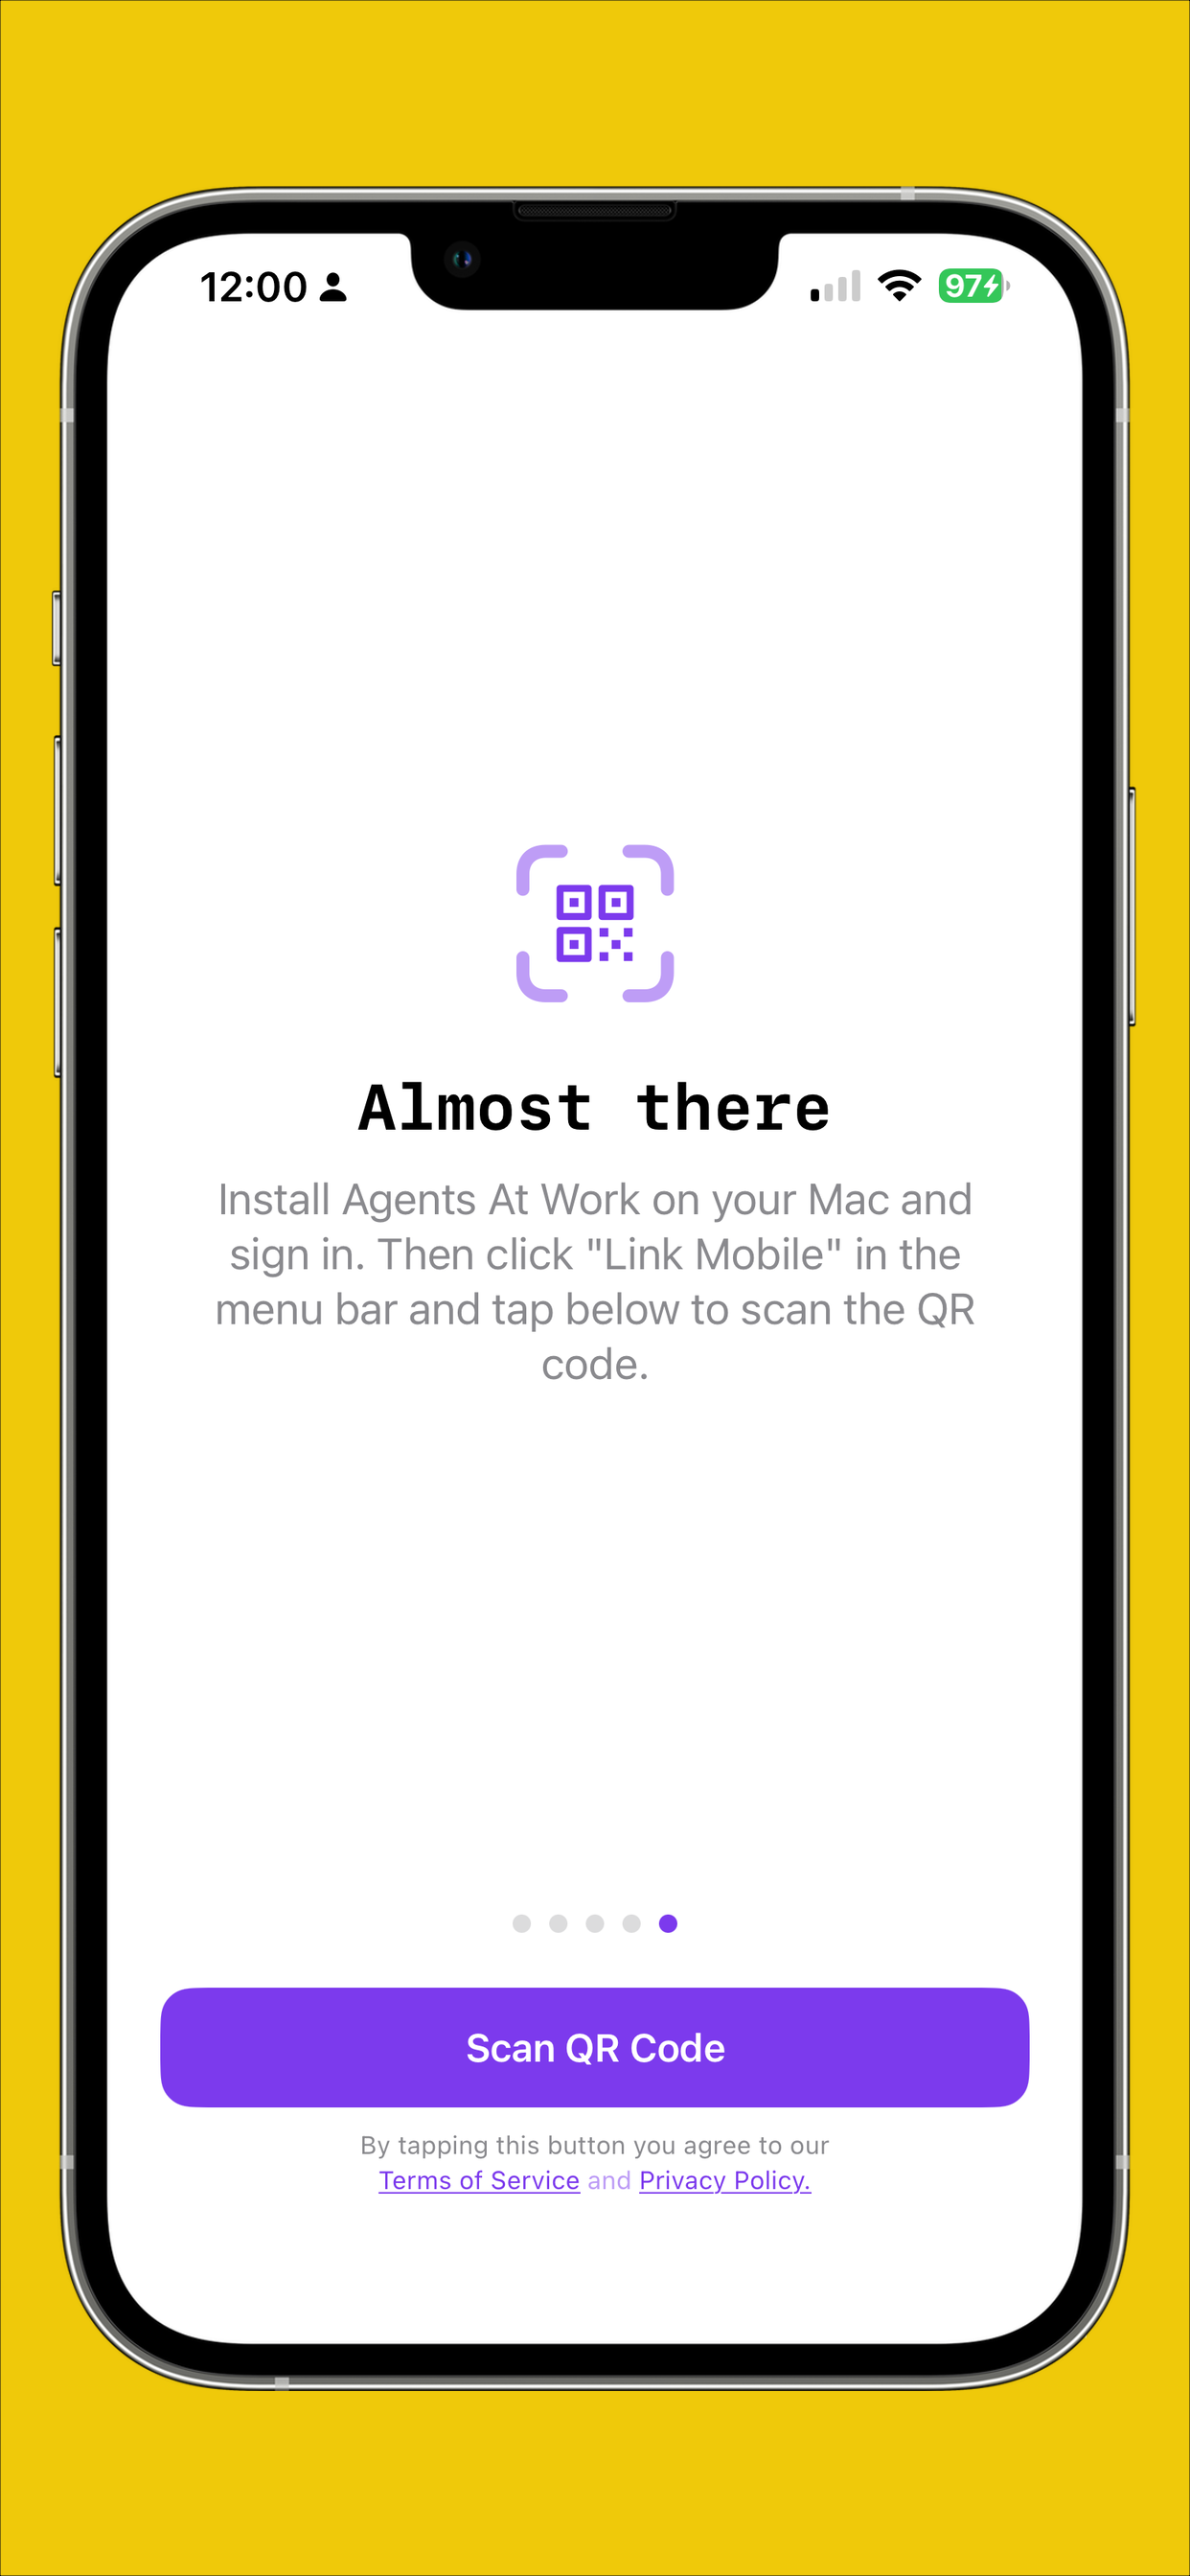
-
7
Watch it work: your first approval
With your agent running and your phone linked, ask the agent to do something that involves running a command. For example:
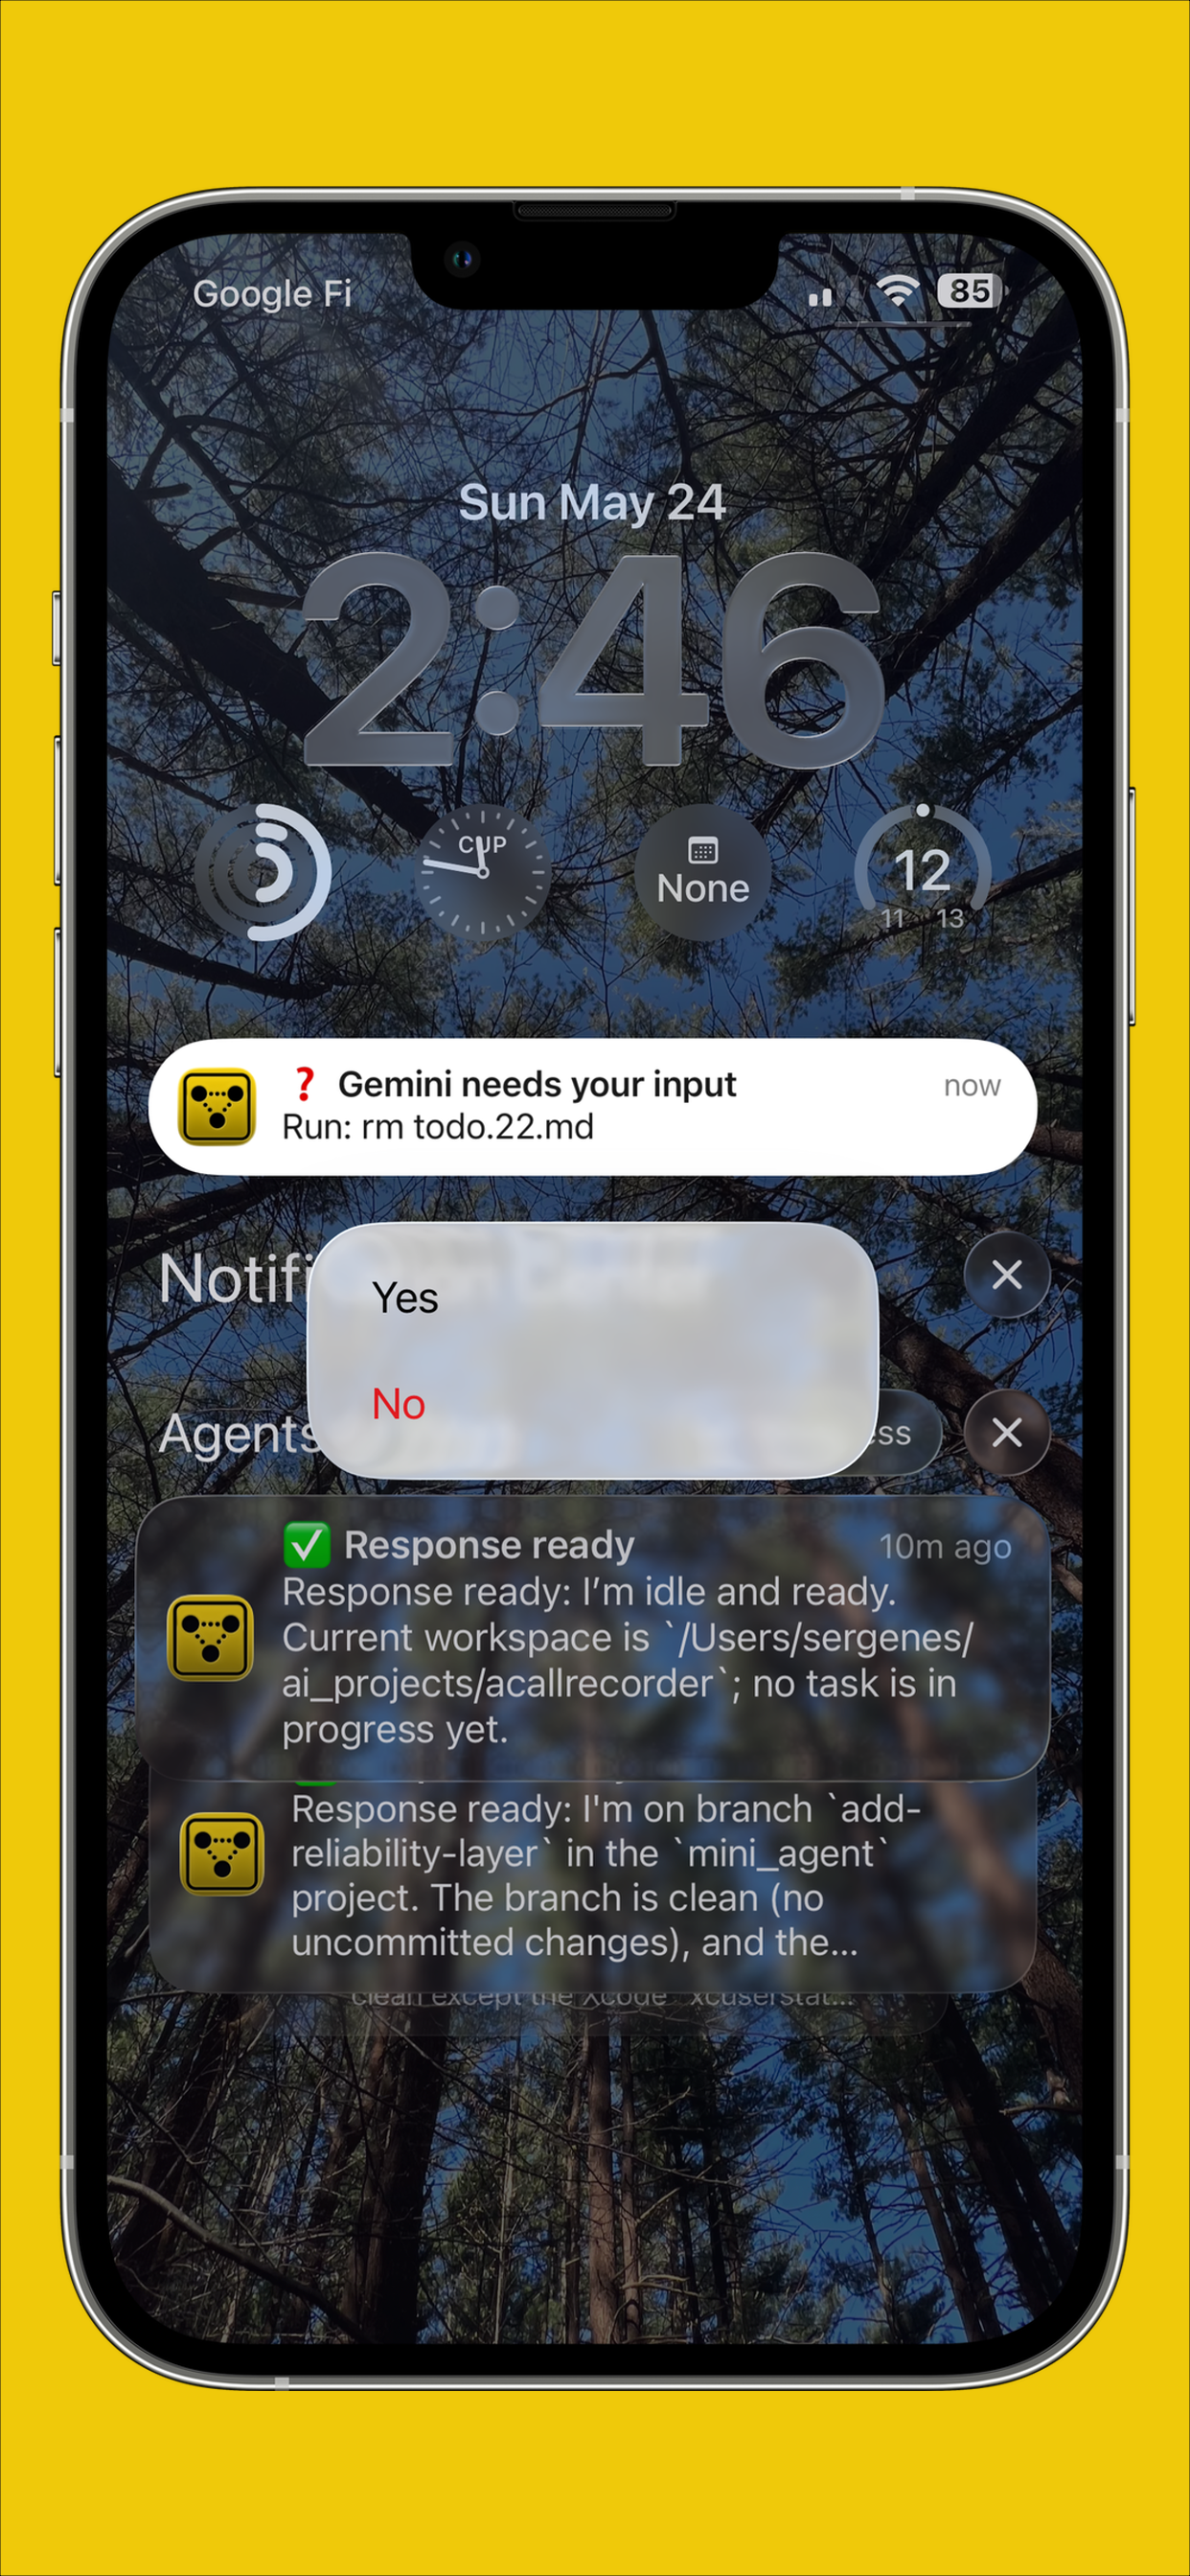
You: add a unit test for the login function and run itWhen the agent tries to execute the test, your phone will receive a push notification. Tap it, or open the Agents At Work app, to see:
- The exact command the agent wants to run
- The conversation context that led to the request
- Yes and No buttons: one tap is all it takes
Tap Yes. The approval goes back to your computer, the command runs, and the conversation continues in real time on your phone.
 Not getting notifications? Make sure the app has notification permission on your phone. On iPhone: Settings → Agents At Work → Notifications → Allow Notifications. On Android: Settings → Apps → Agents At Work → Notifications.How notification delivery works Notifications usually arrive within a few seconds of an event on your computer. Push alerts come through our hosted relay; on a self-hosted relay the phone gets updates while the app is open, but no background push notifications. If notifications stop, or a hook seems to send far more events than the session explains, check the session activity in the macOS app, or
aaw feedon Linux, or contact support@answersolutions.net.Running agents on a laptop? Keep the lid open while you're away. A session stops the computer from sleeping on its own, but closing the lid still puts it to sleep (on a MacBook on battery, always), and a sleeping computer can't run agents or reach your phone. Turn the brightness down if you like, or use closed-display mode with power and an external display. More options in the FAQ.
Linux, or a Mac from the terminal: the command-line flow
There is no app on Linux. A small background service does what the Mac app does,
and one command, aaw, covers pairing and sessions. There is no account
to create and nothing to sign in to.
It runs headless: close the SSH window or log out, and your sessions stay bridged
to your phone. Steps 3, 4, 6, and 7 above apply unchanged; this section replaces
steps 1, 2, and 5A.
The engine is the same on a Mac as on Linux, so a Mac can run it with no app and
nobody at the screen. The Mac app itself also puts aaw in
~/.local/bin, so with the app installed every command in this
section already works in Terminal. For a Mac without the app:
- Install the prerequisites with Homebrew:
brew install pipx tmux. - Install the engine and pair your phone:
pipx install aaw-core, thenaaw linkand scan the QR code. - Start the background service:
aaw service install(a launchd agent), andaaw shell-integration onso typingclaudein a folder bridges it. - For a Mac that reboots unattended, turn on automatic login for this user (System Settings, Users & Groups): the launchd agent starts when that user logs in. If you only reach the Mac over SSH and nobody is logged in, run the service in tmux instead:
tmux new -d -s aaw 'aaw supervisor'. - While a session runs, the engine stops the Mac from sleeping on its own with
caffeinate, but a MacBook still sleeps when its lid closes (see the laptop FAQ). For an always-on Mac, also stop it from sleeping between sessions in System Settings, Energy.
The engine needs Python 3.11 or newer and tmux, not a particular macOS version, so
it may run on Macs older than the app supports (the app needs macOS 14.6). We test
on current macOS, so treat older versions as untested. Use either the app or a
pipx install on one Mac, not both: they share the same settings folder
(~/.aaw) and the same background service.
1. Install
One command installs everything. It checks the prerequisites, installs
aaw-core,
the open-source engine, from PyPI into its own virtualenv in
~/.local/share/aaw-core, and puts aaw in
~/.local/bin. When you run it in a terminal, it also runs
aaw link so you can pair your phone right away (step 2 below), and it
installs the background service, a systemd user unit called aaw-supervisor.
Nothing goes under /usr, and it needs no sudo.
$ curl -fsSL https://agentsatwork.app/install-linux.sh | bash

# it lists anything missing, with the line to fix it, e.g.
Missing prerequisites: tmux python3-venv
  sudo apt install -y tmux python3-venv
The installer also makes plain claude, codex,
gemini, grok, cursor-agent, and scoot
start a bridged session, the same shell integration the Mac app sets up. Open a new
terminal after installing so your shell picks it up.
Prefer to do it by hand? The same steps work on Linux or macOS with pipx:
$ pipx install aaw-core
$ aaw link                    # pair your phone
$ aaw service install         # the background service
$ aaw shell-integration on    # plain claude, codex, ... start bridged sessions
2. Pair your phone
Pairing is one QR scan, the same as on the Mac. The installer runs
aaw link for you; run it yourself any time you want a fresh code.
$ aaw link
# the first time, asks which relay to use: ours (press Enter) or your own
# ... then prints a QR code, scan it with the phone app ...
- Pick the relay. Ours is
wss://relay.agentsatwork.app/v1/ws; if you run your own, choose the second option and enter its address (see the tip below).aaw link --relay URLswitches relays later. - Scan the QR code printed in the terminal with the phone app (Computers list, QR icon at the top right). Same as on the Mac, this one scan links the phone and hands it the end-to-end encryption key.
- Want another phone on the same machine? Run
aaw linkagain and scan the new code. Phones you paired earlier keep working.
aaw link: a Linux monitor, or the laptop window you are SSHed
in from. It is over a hundred characters wide, so if it wraps, widen the terminal or
zoom out (Ctrl and minus) and run aaw link again for a fresh one.
3. Start a session
$ cd ~/projects/my-app && claude       # exactly as on a Mac

# or the explicit form: picks the agent, attaches to its tmux session
$ aaw start ~/projects/my-app                  # the only installed agent, or Claude
$ aaw start ~/projects/my-app --agent cursor   # Cursor
$ aaw start ~/projects/my-app --agent codex    # Codex alongside, as my-app-codex
$ aaw start ~/projects/my-app --agent scoot --model ollama/qwen2.5:latest   # free local model
$ aaw start ~/projects/my-app --agent scoot --model openai/gpt-5.3-codex     # cloud model, needs your key

# day to day
$ aaw status                # sessions, daemons, service
$ aaw feed my-app           # the conversation, paged so it scrolls and / searches (tmux can't)
$ aaw feed my-app --remote  # the full retained history from the relay, like the phone and Mac feed
$ aaw feed my-app -f        # follow the live feed in the terminal
$ aaw mobile-mode on        # route permission prompts to the phone
$ aaw schedule my-app "run the tests" --at 10pm   # queue a prompt (24h 22:00 or 12h 10pm both work)
$ aaw scheduled my-app      # list queued prompts; --edit / --delete to change them
$ aaw send my-app "also update the README"      # send a prompt right now
$ aaw stop my-app-codex     # stop one session, the others keep running
$ aaw quit                  # stop the service and every session; it stays installed
$ aaw --help                # every command, with examples
Your terminal is attached to the agent's tmux session. Detach with
Ctrl-b then d; the session keeps running, and
tmux attach -t =aaw-my-app brings it back. From here on it is Step 7:
ask the agent to do something, and answer the prompt on your phone.
4. Keep it running
The service starts at login and restarts itself if it dies. On a server, it stops
when you log out unless lingering is on, so tell systemd to keep your user session
alive across logouts and reboots. aaw service install reminds you when
lingering is off.
$ sudo loginctl enable-linger $USER
$ aaw status                                # sessions, daemons, service
$ systemctl --user status aaw-supervisor
$ tail -f ~/.aaw/logs/supervisor.log        # its log; each session has daemon.<session>.log
$ curl -fsSL https://agentsatwork.app/install-linux.sh | bash   # run again to update
Everything the service keeps lives in ~/.aaw. To remove it all from the
machine, run aaw uninstall.
tmux on RHEL 10
RHEL 10 and its rebuilds ship a 2023 snapshot of tmux ("next-3.4") that crashes
the moment anything reads a terminal pane, which the bridge does constantly. The
installer detects it, refuses to continue with it, and prints how to build tmux 3.5
into /usr/local/bin.
Ubuntu, Debian, and Fedora packages are fine.
On a laptop
The service holds a systemd-inhibit lock so the machine doesn't
sleep on its own, but most laptops still suspend when the lid closes. To keep
agents running with the lid shut, set HandleLidSwitch=ignore and
HandleLidSwitchExternalPower=ignore in
/etc/systemd/logind.conf and reboot.
More in the FAQ.
Called "localhost" on the phone?
The phone shows the machine under its hostname. To pick another name, set
"computer_name" in ~/.aaw/config.json (or the
AAW_COMPUTER_NAME environment variable) and restart the service with
aaw service stop and aaw service start.
Run your own relay
The relay is part of aaw-core
and starts with docker compose from the repo. On a self-hosted relay
the phone gets updates while the app is open, but no background push
notifications, since those need the store apps' push credentials. Computers on
a self-hosted relay never count toward a plan.
Sessions from the phone
A stopped project can be restarted from the phone, and /restart
works in the feed. The service picks the request up and brings the session
back under the same name, headless.
Mac and Linux side by side
Pair each computer by scanning its QR code from the same phone. The phone shows
each computer with its own sessions. Free covers one computer on our relay,
Personal up to three, and Pro up to fifteen, in any mix of Mac and Linux.
Scoot works on both: start it from the Mac app, or aaw start --agent scoot.
Using Scoot: local and cloud models
Scoot 🛴 runs in a terminal exactly like the other CLI agents, and it reaches both free
local models with Ollama and cloud models like OpenAI and Anthropic when you add your own
key. You pick the model as provider/model, for example
ollama/qwen2.5:latest or openai/gpt-5.3-codex. Scoot is a full
agent: it reads and writes files, lists directories, and runs shell commands to work
through a goal, asking for your approval before anything destructive, the same as Claude
Code or Codex.
The one thing that matters is the model. Scoot works by calling tools, so a local model
has to be one that can return tool calls. Cloud models all can; among
local Ollama models, use a tool-capable one, the qwen2.5 family or
qwen3. A model that can't return tool calls can't act, so Scoot won't run on it.
Free, private, and running entirely on your hardware, with no API key and no per-query charges. Use a tool-capable model: qwen2.5, qwen2.5-coder, or qwen3.
Good for:
- Editing, refactoring, or generating code in your project
- Summarising a folder of documents into a single file
- Running scripts and reviewing their output
- Multi-step tasks you'd normally do in a terminal, kept entirely on your machine
OpenAI, Anthropic, and other providers when you add your own key with scoot auth set <provider>. Every cloud model is tool-capable, so any of them works.
Reach for these when you want a bigger, more capable model than your hardware can run locally, while keeping the same terminal session, live feed, and one-tap approvals.
Choosing a local model
Among the tool-capable Ollama models, the qwen2.5 family is the most reliable choice; pick a size based on how much RAM you want to use. A 7 B model runs comfortably on a machine with 8 GB of RAM; larger models (14 B, 32 B) give noticeably better results with 16 GB or more.
qwen2.5:7b
Fast, runs on 8 GB RAM. Good for quick, everyday tasks. Best starting point if you're not sure.
qwen2.5-coder:14b
Tuned for code. Better tool-use reliability than the base model. Needs 16 GB RAM. Recommended for code-heavy tasks.
qwen2.5:32b / qwen3
Best reasoning and multi-step accuracy. Requires 32 GB RAM. Worth it on an M-series Mac with unified memory or a Linux box with a large GPU.
How approval works
Before the model deletes a file, overwrites an existing one, or runs a shell command, it pauses and asks you. You'll see the exact action it wants to take, then choose:
- Yes, approve this one action and continue.
- Yes for this session, approve all future actions of the same type for the rest of this session, no more prompts until you close the session or tap the revoke button in the session window.
- No, cancel the action. The model sees a "cancelled by user" message and decides what to do next.
If you're working from your phone, the prompt arrives as a tap-to-approve card in the Agents At Work app, the same experience as approving a Claude Code or Codex tool call. If you're at your Mac, the prompt appears inline in the session window.
aaw on Linux, or from your phone.
Tips for getting more out of it
Run multiple agents at once
Start separate sessions in different project folders at the same time: Claude on your backend, Gemini on docs, Codex on tests, Scoot on a writing project. The mobile app tracks all of them, grouped by computer.
Auto-approve mode
Toggle "Allow all for this session" when you trust the agent to work unattended. Every tool call goes through without waiting for your tap. Auto-approve resets automatically when the session ends.
Send a mid-session message
Use the text field at the bottom of any session screen to nudge the running agent: corrections, new context, or a change of direction, without interrupting its flow or restarting the session.
Schedule a prompt for later
Queue a prompt now and let the agent run it at a time you pick, e.g.
2 AM when your token limit resets, so a spent quota turns into work
done overnight. Open the session menu, tap
Schedule a Prompt…, pick a time, and it waits in a
queue you can edit or cancel. On Linux, use aaw schedule.
Connect multiple computers
Scan the QR code of each computer, Mac or Linux, from your phone and they all appear in the app, grouped by computer. The free plan covers one computer on our hosted relay, Personal up to three, and Pro up to fifteen. Re-scanning a computer you already have never counts twice. See Pricing.
Answer from the lock screen
Permission notifications include inline Yes / No action buttons. You can approve or deny without even unlocking your phone, just long-press the notification.
Approve from your watch
Because Agents At Work uses standard iOS and Android notifications, permission prompts arrive on your Apple Watch or Wear OS watch automatically, no extra setup. Tap Yes or No directly on your wrist and the agent continues, no need to reach for your phone.
End-to-end encrypted
Prompts and responses pass through the relay, which holds them while your phone is asleep, but we cannot read them. Every conversation is encrypted (AES-256-GCM) with a key that is unique to your computer and generated locally, and it never touches our servers. The only time it travels anywhere is when it is embedded in the QR code you scan to link your phone. From that point on, your computer and phone share a secret that nobody else has, not even us.
Sessions survive disconnects
If your phone goes offline, the agent keeps running on your computer. Any missed approvals will queue. Open the app when you reconnect and you'll see everything that happened while you were away.
Unlink or re-link anytime
Got a new phone? Open Settings → Unlink this Phone
on your old phone, or swipe a single computer away in the
Computers list, then scan the QR code from your new phone. Link Mobile on the
Mac, or aaw link on Linux, always generates a fresh code.
Updating Agents At Work
New versions ship bug fixes and feature updates. Here's how to update safely without losing any running sessions, on a Mac and on Linux.
- Download the latest AgentsAtWork.dmg from the download section.
- Quit the currently running Agents At Work app: click the menu bar icon and choose Quit. The app can't replace its own files while it's still running.
- Open the new
.dmgand drag Agents At Work into your Applications folder, overwriting the old version. - Launch the new version. On first launch macOS may show a Gatekeeper dialog, click Open, the app is notarized by Apple.
- That's it. The new version automatically reinstalls the latest scripts and hooks, and reconnects to any agent sessions you left running, no need to restart your coding session.
- Run the install command again:
curl -fsSL https://agentsatwork.app/install-linux.sh | bash. It upgrades aaw-core from PyPI in its own virtualenv and restarts the background service. If you installed by hand, usepipx upgrade aaw-core. - Running sessions are untouched: the service reattaches to them within seconds, exactly like the Mac app.
Moving from the earlier version
Earlier versions of Agents At Work used accounts, a sign-in on the computer, and Firebase to carry your sessions. The current version has no accounts and runs on aaw-core with a relay, so each computer needs to be paired once more with a QR scan.
- Update the Agents At Work app on each phone from the App Store or Google Play.
- On each phone, remove the old computers: swipe each one away in the Computers list, or open Settings → Unlink this Phone to remove them all at once.
- Install the new Mac app over the old one and open it. On first launch it removes what the old version left behind: its background daemons, hooks, the line it added to your shell, and the
~/.agent-bridgefolder. - Click Link Mobile in the menu bar and scan the QR code with your phone.
- Run the install command again, or run
aaw updatewith the old tool. Either one replaces the old host with aaw-core. - Run
aaw linkand scan the QR code with your phone.
Prefer pipx? The old tool's uninstall leaves its ~/.local/bin/aaw behind, and pipx will not replace it, so aaw then fails with "run_python.sh: No such file or directory". Remove it first: rm ~/.local/bin/aaw, then pipx install --force aaw-core. The install command above does this for you.
You're all set.
Your agent is running on your laptop, your home server, or a cloud VM.
Your phone is watching.
Step away from the desk.